User List
On User List, add users and view the information about the added users.
- You may add and manage users only if you have the proper permission.
To edit the needed user, select the edit icon ![]() next to their name.
next to their name.
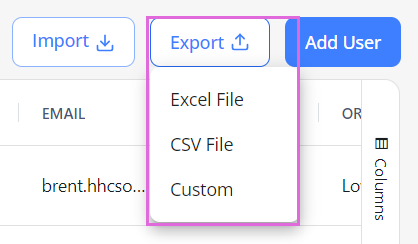
To export the list of users, select Export in the upper right and choose the needed format (if you have the proper permission). Hide the imageSee the image.
Add a user manually
To add a user:
- On User List, select Add User above the grid.
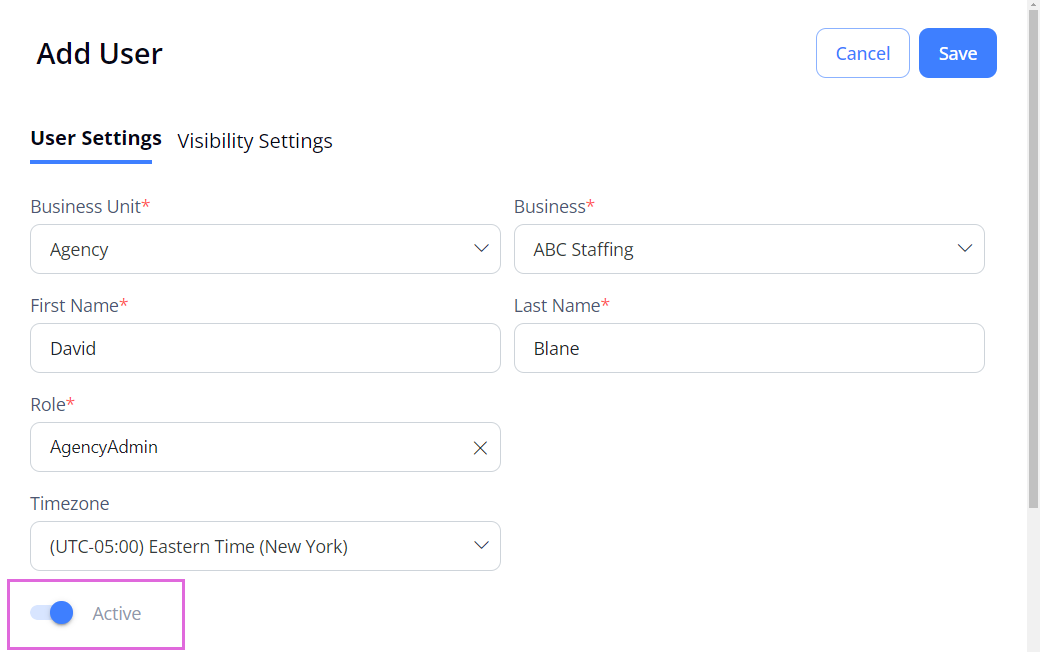
- In the Add User sidebar > User Settings tab, fill in all the required (*) fields and select the needed time zone (optional).
- The Role dropdown list includes the roles preconfigured by your Administrator. The selected role controls what a user can do in the application.
- Ensure the Active toggle is turned on. Hide the imageSee the image.
- Select Save.
The added user appears in the Users grid and will receive a welcome email with the auto-generated credentials to sign in to Einstein II. Hide the imageSee the image.

- The Welcome email is automatically sent to new users only if this is enabled in your Agency's configuration.
Resend Welcome email
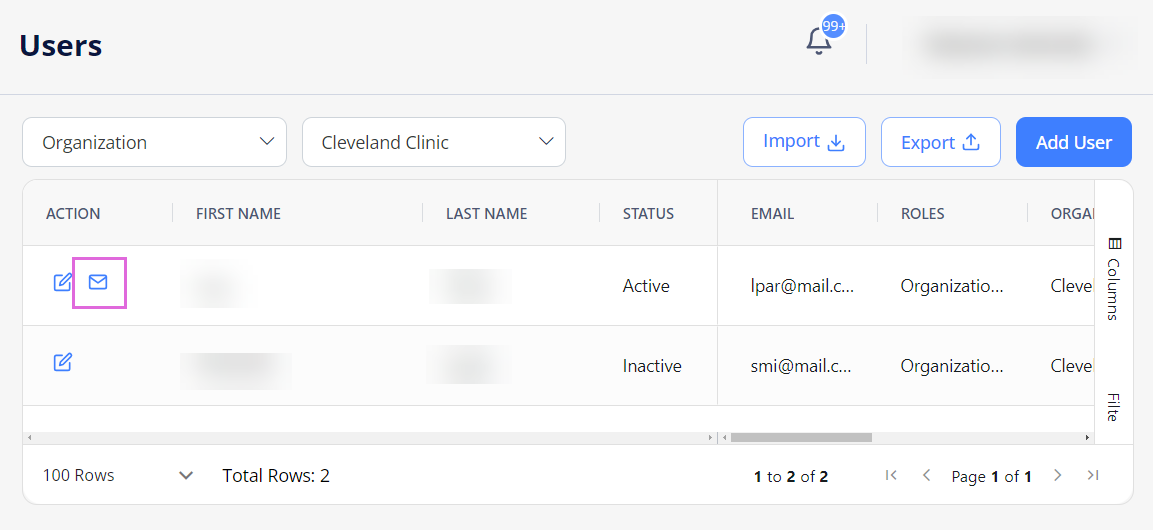
You can also resend the Welcome email to Active unregistered users in one of the following ways:
- To send the email to an individual user, select the email icon
 next to the needed user record. Hide the imageSee the image.
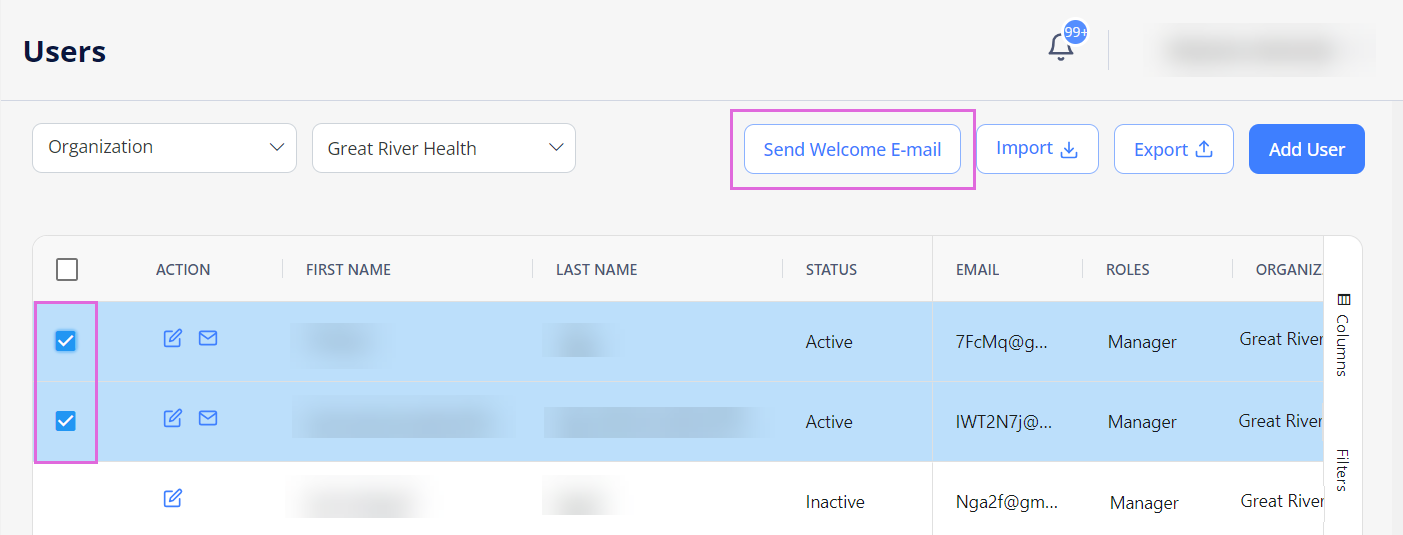
- To send the email to multiple users at a time, select the check boxes next to the needed records in the grid, and then select Send Welcome Email above the grid (if you have permission to use this option). Hide the imageSee the image.
Import users
To import multiple users at a time from an excel file into Einstein II:
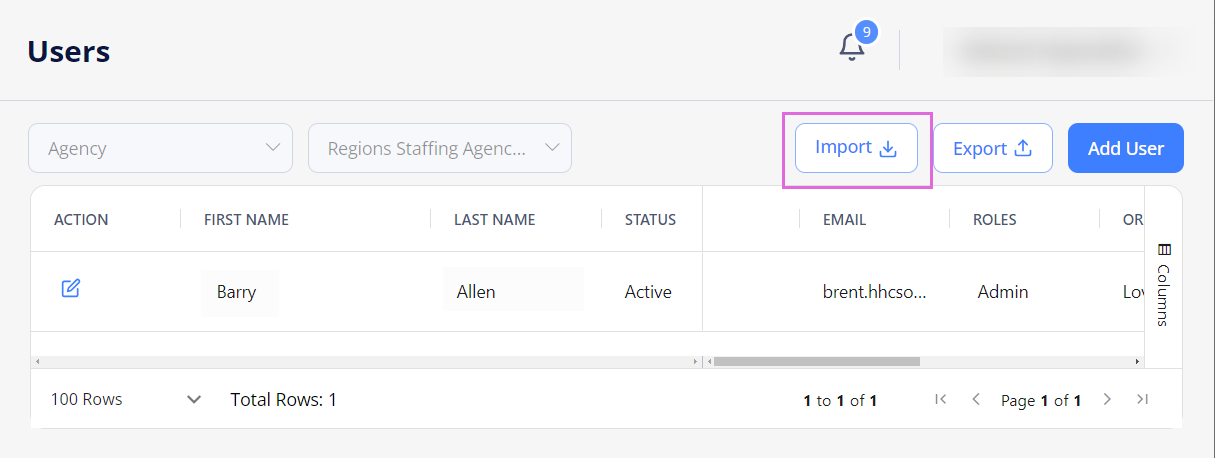
- On User List, select Import above the grid. Hide the imageSee the image.
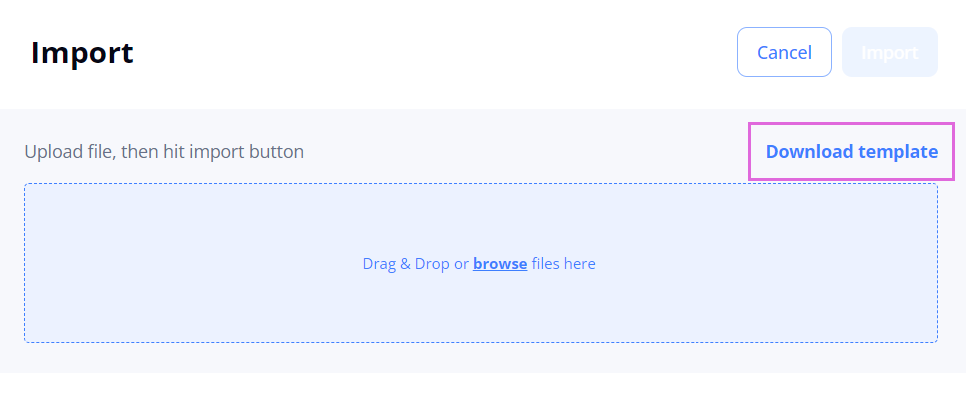
- In the Import sidebar, select Download Template. Hide the imageSee the image.
- Open the downloaded Excel file and add the required information about each user in the corresponding fields.
- Upload the file with the added information into Einstein II, and then select Import. Hide the imageSee the image.

- Check the data on the following tabs:
- The Successful tab displays the successfully processed user records. Hide the imageSee the image.
To import them, proceed to Step 6.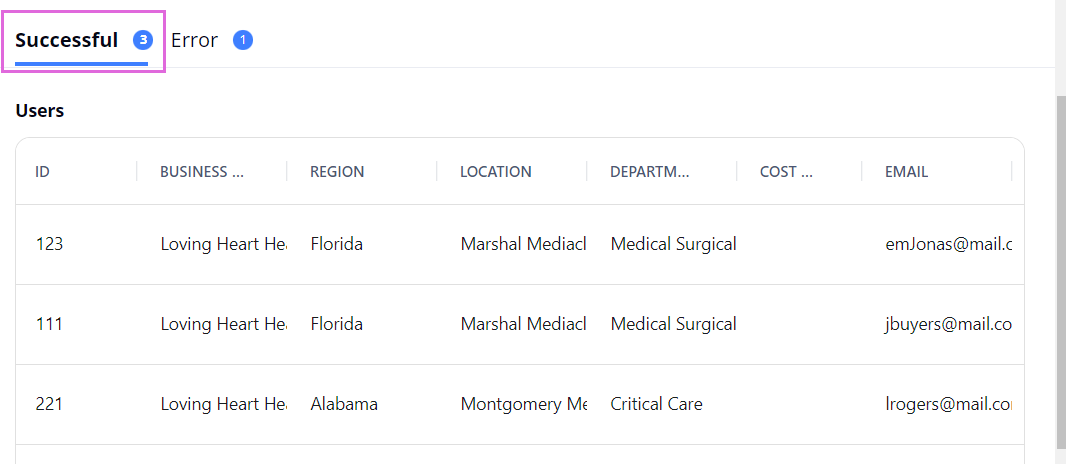
- The Error tab displays the user records that failed to be processed. Hide the imageSee the image.
To fix the errors, select Download file with Errors, make the needed edits in this file, and re-upload it into the system. Then, proceed to Step 6 to import the records.- Make sure that this time you only upload the fixed records and not all of them again, or they will duplicate the data loaded successfully the first time.

- The Successful tab displays the successfully processed user records. Hide the imageSee the image.
- To import the successfully processed data, in the upper right, select Import. Hide the imageSee the image.
- You can import only the successful user records first and re-import the failed ones later.
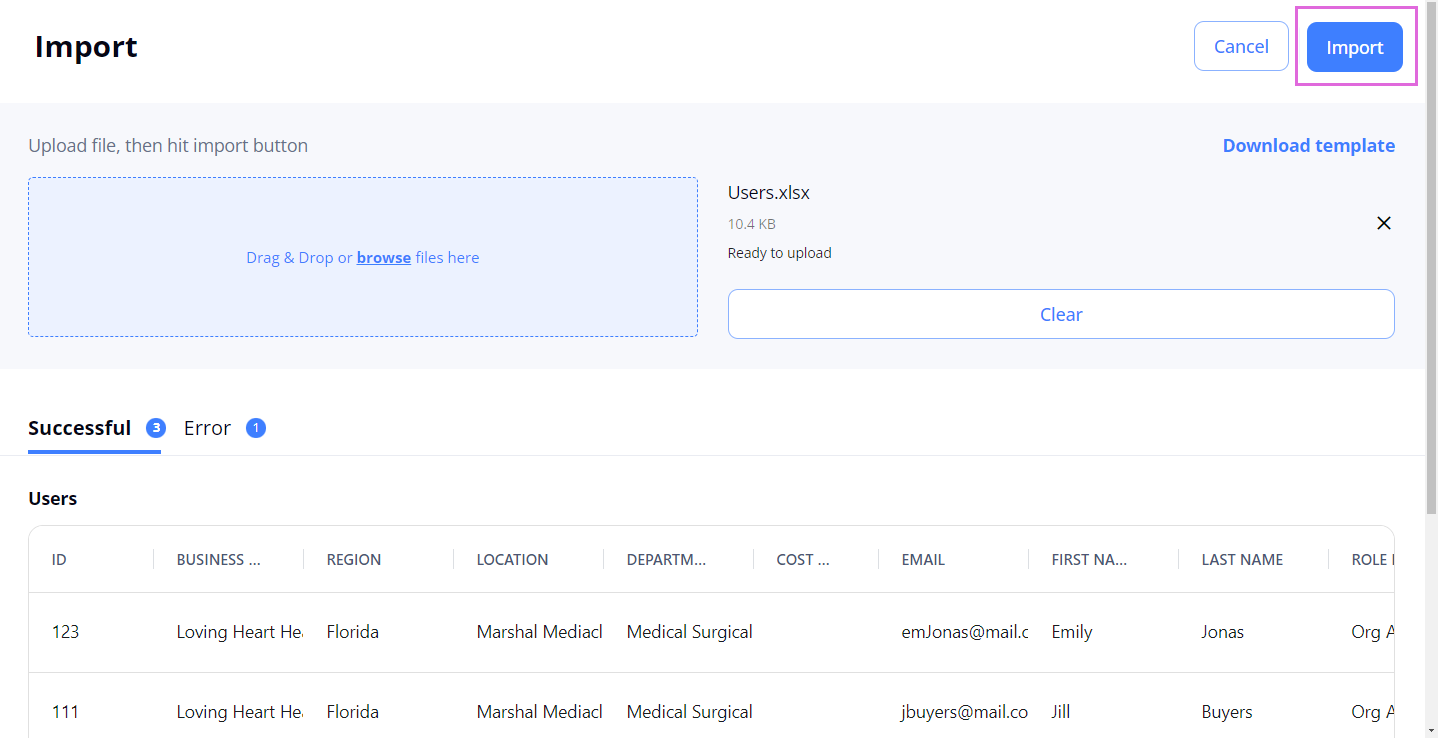
After this, the successfully imported users appear in the Users grid. You can edit the user and visibility settings for them by editing ![]() the needed user records.
the needed user records.
Add user visibility
You can add user visibility to restrict the data a user can access in the application (orders, timesheets, invoices, assignments, reports, widgets data, etc.)
To do this:
- In the Users grid, select the edit icon
 next to the needed user.
 - In the Edit User sidebar > Visibility Settings tab, select + Add Visibility. Hide the imageSee the image.
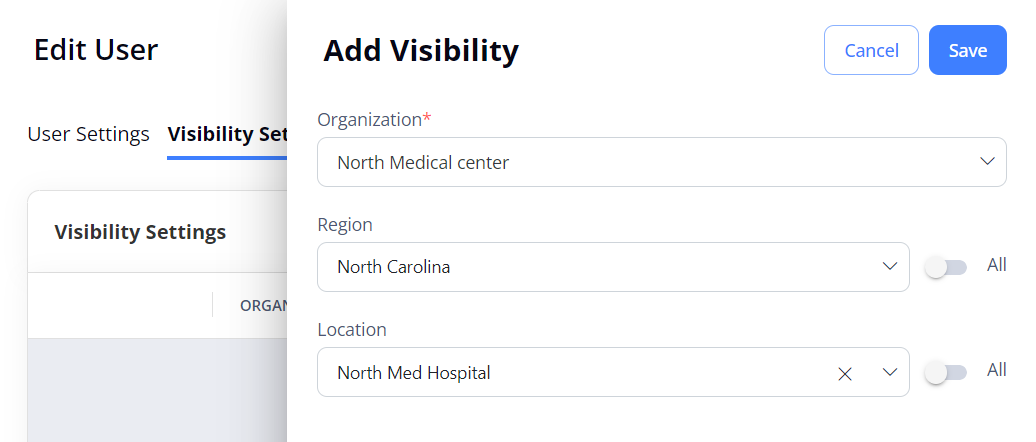
- In the Add Visibility sidebar, select the Organization, region(s), and location(s) to which you want to grant this user access, and select Save. Hide the imageSee the image.

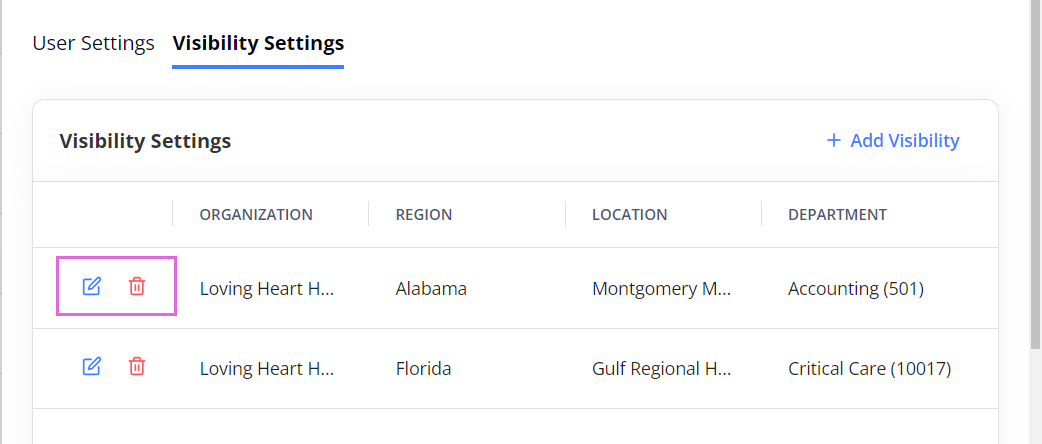
In the Visibility Settings grid, view all the added visibility settings for this user. Here you can also edit and delete the needed ones. Hide the imageSee the image.
Deactivate a user
To deactivate a user:
- In the Users grid, select the edit icon
 next to the needed username.
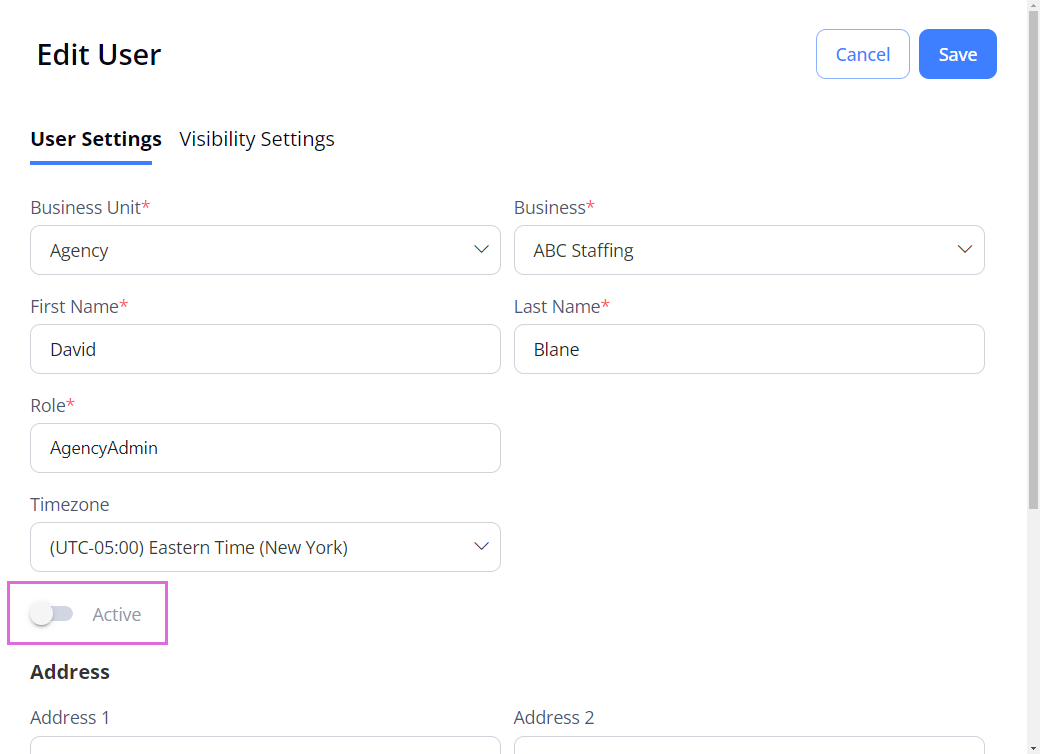
 - In the Edit User sidebar > User Settings tab, turn OFF the Active toggle. Hide the imageSee the image.
- Select Save.
The user appears with the Inactive status in the Users grid. Hide the imageSee the image.
